Contents
Articles of the series:
- Intro
- Part 1— HTML, CSS — visual part
- Part 2 — Front-end development
- Part 3— Backend development
We will start with the visual piece of web development.
How does it work?
As referenced in the introduction, the browser receives data from a server. It could be images, Cascading sheet styles (CSS), Hypertext Markup Language (HTML), Javascript (JS) files, and so forth.
The browser reads HTML, CSS, JS files and performs a specific behavior.
- HTML — responsible for contents. It characterizes elements hierarchy and type.
- CSS — defines elements styles and positioning.
- JS — adds interactive behavior. Can alter both CSS and HTML dynamically.
HTML
Eventually, HTML is a language to portray where elements belong. Sets segments and logical parts.
Such as header, footer, navigation, sidebar, etc.
For what reason do we require that by any stretch of the imagination? It is an approach to describe to the computer what occurs on pages. HTML set visual representation. At least the basic one which defined by default setting of the browser.
Additionally, semantic HTML used by screen readers and search engines. It assesses to evaluate the text by parsing into logical elements.
Documents constructed of block named tags. There are two types of tags. Hierarchical and non-hierarchical.
First ones can include other tags inside themselves and consist of opening tag and closing. Will look like that:
<p> Some content </p>There are rules for inclusion which you will discover in the process of learning.
Second ones will be like that:
<input />HTML has basic structure rules. Example of a basic document:
<!DOCTYPE html>
<html>
<head>
<title>Page Title</title>
</head>
<body><h1>My first Heading</h1>
<div class="some-block">
  <p>My first paragraph.</p>
</div></body>
</html>
Result:
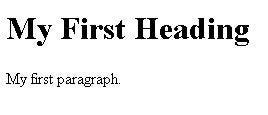
Let’s understand what happens here. First, we define document type by <!DOCTYPE html>.
At that point open the document by <html>.
Put inside <head></head>. There will be placed all invisible data. Such as metadata, styles and title of a browser tab.
Then <body> </body>, here will be placed visible contents of the page.
Read all chapters of this tutorial not neglecting to attempt it yourself. It will be all that one could need on this stage.
Each tag has attributes. By setting attributes different manipulations could be performed: styles, events, identificators. Here is the full list of attributes.
Example of tag with attributes:
<div id="some-id" class="some-class" style="color:red;" ></div>CSS
Cascading Style Sheets may interact with HTML in a few different ways. Inline style is set as an attribute: <div style=""></div>. Inline styles work straightforwardly on a tag and do not require characterizing association with a tag.
Another path is to include CSS file in our head tag. Along these lines:
<head>
  <link rel="stylesheet" type="text/css" href="styles.css">
</head>
Or on the other hand to write styles inside a head tag:
<head>
  <style>
   .some-class{
     color:red;
   }
  </style>
</head>
Head styles require characterizing an association with tags using so-called “selectors”.
Attempt to include styles in all ways. Each ought to be utilized correspondingly to use case. In greater web applications suggested to use an external file as it brings more order to a project.
Presently we see how to include styles. How actually should we write styles?
Coming up next is styles syntax.
Inline styles:
<div style="color:red;background:blue;" >Text</div>Head styles:
div{
  color:red;
  background:blue;
}
There are multiple ways to reach tags for styling. It could be done by tag, class, id. Likewise, the hierarchy will assist in reaching specific elements. For instance:
body{
 background:#E0F7FA;
}h1{
  color:#64B5F6;
}div.some-block {
  background: #F3E5F5;
 padding: 5px 10px;
}div.some-block p{
  color: #CE93D8;
}
Result:
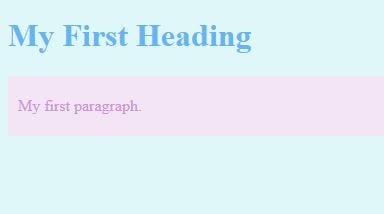
From that, you can continue with experiments. Here is the page we created. Try doing modifications.
There are good CSS tutorials here. They cover all the aspects of styles.
Helpful instruments
Codepen — HTML, CSS, JS online editor.
Chrome dev tools — Development tools inside a browser.
Conclusion
Congrats, you already can create your first website!
Presently, it will be static pages. But with this knowledge, it’s possible to create dynamic websites using one of Content Management Systems (CMS). For example, WordPress.